Issue:
I need to connect Asterisk to my Cisco CallManager 3.51 server to allow for phone migration from one system to the other. Since CCM 3.51 does not support SIP I need to get H323 working on Asterisk.
Quick/Visual/Learning:
I found a good link to get me started: Asterisk Cisco CallManager Integration
Talks about integration using either H323 or SIP. CCM 3.51 only supports h323 so I need to get h323 working on Asterisk.
For H323 I found another link: Compiling Asterisk 1.4 with TDM400 and H323 .
Following along using this guide-
The gcc-g++ was already downloaded in Asterisk PBX System Install - 03 Software, as was the kernel-devel module, but not gnutls-devel so I install that one:
#yum install –y gnutls-devel
It is not talked about here but I got an error later on that pwlib needed the fast lexical analyzer generator. After doing some poking around I discovered that I could load this using yum so I will do that now too:
#yum install –y flex
I am not interested in Google Talk so I skip the iksemel download and I already have the correct version of make that is above version 3.80, so on to the section: “Download and install OpenH323 libraries”
Need to download some source files. I will put these in the same place as my other files.
#cd /usr/src
#wget http://downloads.sourceforge.net/openh323/pwlib-v1_10_3-src-tar.gz
#tar zxvf pwlib-v1_10_3-src-tar.gz
#cd pwlib_v1_10_3/
#./configure
#make
#export PWLIBDIR=/usr/src/pwlib_v1_10_3
My path in the export command is different then those in the astrecipes link because I downloaded my files to a different directory then he did. The export command creates a shell variable that is also recognized by the kernel. In this case the variable contains the path to our pwlib directory. This is an important step as openh323 needs this path variable.
#cp $PWLIBDIR/lib/libpt_linux_x86_r.so.1.10.3 /usr/lib
Manual copy of the shared library to the system folder. Notice here that we are using the path variable that we created with the export command above.
The full path is:
/usr/src/pwlib_v1_10_3/lib/libpt_linux_x86_r.so.1.10.3 /usr/lib
By using the $PWLIBDIR variable we save a few keystrokes.
Go back one directory to the src directory
#cd ..
Next we do pretty much the same thing to install openh323:
#wget http://downloads.sourceforge.net/openh323/openh323-v1_18_0-src-tar.gz
#tar zxvf openh323-v1_18_0-src-tar.gz
#cd openh323_v1_18_0/
#./configure
This next command took several minutes on my machine so be patient.
#make opt
#export OPENH323DIR=/usr/src/openh323_v1_18_0
#cp $OPENH323DIR/lib/libh323_linux_x86_r.so.1.18.0 /usr/lib
#cd ..
The next section is about installing Asterisk which I have already done, but I need to recompile Asterisk to see the h323 stuff.
#cd /usr/src/asterisk-1.4.23.1
#make clean
#./configure
#make menuselect
I see that asterisk now has the chan_h323 option selected. That was a happy little moment.
Press x to exit out of menuselect
You need to run make twice now. The first time you get an error that you need to run it again, so just do it.
#make
#make
#make install
I am not going to "make samples" because that would overwrite the work I have done in my .conf files.
Note - If you run "make samples" by mistake the existing .conf files get written to .conf.old files but just to be safe you should probably save all the work you have done in the .conf files somewhere else once in a while.
#cd ..
To start asterisk type:
#asterisk
Attach to the console with:
#asterisk -vvvvr
It should be running now with H323.
Next time more work to connect to CallManager.
Asterisk PBX Install - Index
Showing posts with label Asterisk. Show all posts
Showing posts with label Asterisk. Show all posts
Friday, June 5, 2009

Monday, June 1, 2009
Asterisk PBX System Install - 11 Overhead Paging
Issue: Access to Valcom paging system
Quick/Visual/Learning:
Overhead paging system
Valcom V-2003A
Quick/Visual/Learning:
Overhead paging system
Valcom V-2003A

Our current system requires us to dial *60, at that point you hear a tone, then dial 1 to access the over head speakers and talk into the phone to make the announcement.
Looking at our Cisco routers I see that one of the ports is dedicated to this function.
You can see below that voice port 2/0 is configured as the paging port on the 1760 router.
Cisco 1760 Configuration
voice-port 2/0
trunk-group Outbound 2
input gain 2
output attenuation 2
echo-cancel coverage 32
echo-cancel erl worst-case 0
no vad
no comfort-noise
connection plar 401
impedance complex2
description paging port
To access the port a dial-peer is configured to look for the dial pattern of *60
!
dial-peer voice 86 pots
destination-pattern *60
port 2/0
forward-digits 0
!
Now all I need to do is get Asterisk to connected to the Cisco router and pass the dialed numbers (*60) to the router. I read on page 140 of the Asterisk book that Asterisk saves the dialed extension in a variable ${EXTEN}. So let’s edit extensions.conf file.
I added a context called [overhead-paging]
[overhead-paging]
exten => *60,1,Dial(${OUTBOUNDTRUNK}/${EXTEN})
exten => *60,n,Congestion()
exten => *60,n,Hangup()
As you remember OUTBOUNDTRUNK is my variable for the Cisco router (Post 8). So this connects to the router and passes the dialed number of *60.
If there is a problem Congestion gives a fast busy sound, and the line hangs up.
Under the [internal] context I add overhead-paging to the list of included contexts.
[internal]
include => outbound-local
include => parkedcalls
include => overhead-paging
That’s it. I reload the dialplan and press *60 on one of the phones. This gets passed to the Cisco router. The router matches the *60 to the port for the paging system. I hear the tone, dial 1, and now I can talk over the overhead speakers.
Next problem to work on is Cisco CallManager Intergration
Wednesday, May 27, 2009
Asterisk PBX System Install - 10 Conference And Parked Calls
Issue: Asterisk configuration for call parking and conference rooms.
Quick: features.conf file and meetme.conf file
Visual/Learning:
Lesson learned here was that if you do not have zaptel ztdummy configured correctly then conference rooms are not going to work.
Call Parking - Allows you to send a call to a holding area and then pick that call up from another phone. We use this feature a lot in our company. We sometimes park calls when an urgent call comes in and the person is not at their desk. We just park the call and page the person using our intercom system. They can then take the call from the nearest available phone.
Setup for this feature happens in the features.conf file.
[general] section
parkext => 700 (This is the number where you transfer the call to park it, the system tell you what position the call is in)
parkpos => 701-720 (this provides 20 parking positions 701 to 722)
context => parkedcalls (sets the context for parked calls)
parkingtime => 45 (Set seconds to park, if the call is not picked up before the time limit it is transferred back to the extension that sent the call to parking)
In my extensions.conf file I need to include the parkedcalls context
[internal]
include => parkedcalls
To get this to work you need to restart Asterisk. A simple reload will not get the changes in the features.conf file.
After restarting Asterisk this is how it works.
You get a call and answer it.
Now I use the 'more' softkey to get to the 'trnsfer' softkey and press it.
I dial 700 and I hear the system speaks the numbers 7 0 1 and I press the 'trnsfer' softkey again.
Now using any phone I can dial 701 and I am connected back to the caller.
MeetMe Conferencing
Allows callers to conference by calling a meeting conference number. Conference calls can be protected by passwords as well.
edit meetme.conf
[rooms]
conf => 350,54321
Save this file
350 is the conference room extension, and 54321 is the password for the conference room. You can leave this off if you want like this:
conf => 350
Edit the extensions.conf file.
Under our internal context:
[internal]
exten => 350,1,MeetMe(350)
You can add so function by adding some line before connecting to the conference call. I learned the hard way not to add these lines after connecting the conference all. It did not work and I got an error message in the console that:
" No Zap channel available for conference, user introduction disabled"
So please put the call to the MeetMe conference room last.
exten => 350,1,Playback(conf-thereare)
exten => 350,n,MeetMeCount(350)
exten => 350,n,Playback(conf-peopleinconf)
exten => 350,n,MeetMe(350)
Line one plays a message that "There are currently..."
Line two plays the number of people in the conference call
Line three plays a message "...people in this conference"
Line for connects the call to the conference.
So the first caller dials 35o and hears:
"There are currently zero people in this conference"
The next person to call will here that there is one person, and so on.
Next time connecting to our intercom system.
Asterisk PBX System Install - 11 Overhead Paging
Asterisk PBX Install - Index
Quick: features.conf file and meetme.conf file
Visual/Learning:
Lesson learned here was that if you do not have zaptel ztdummy configured correctly then conference rooms are not going to work.
Call Parking - Allows you to send a call to a holding area and then pick that call up from another phone. We use this feature a lot in our company. We sometimes park calls when an urgent call comes in and the person is not at their desk. We just park the call and page the person using our intercom system. They can then take the call from the nearest available phone.
Setup for this feature happens in the features.conf file.
[general] section
parkext => 700 (This is the number where you transfer the call to park it, the system tell you what position the call is in)
parkpos => 701-720 (this provides 20 parking positions 701 to 722)
context => parkedcalls (sets the context for parked calls)
parkingtime => 45 (Set seconds to park, if the call is not picked up before the time limit it is transferred back to the extension that sent the call to parking)
In my extensions.conf file I need to include the parkedcalls context
[internal]
include => parkedcalls
To get this to work you need to restart Asterisk. A simple reload will not get the changes in the features.conf file.
After restarting Asterisk this is how it works.
You get a call and answer it.
Now I use the 'more' softkey to get to the 'trnsfer' softkey and press it.
I dial 700 and I hear the system speaks the numbers 7 0 1 and I press the 'trnsfer' softkey again.
Now using any phone I can dial 701 and I am connected back to the caller.
MeetMe Conferencing
Allows callers to conference by calling a meeting conference number. Conference calls can be protected by passwords as well.
edit meetme.conf
[rooms]
conf => 350,54321
Save this file
350 is the conference room extension, and 54321 is the password for the conference room. You can leave this off if you want like this:
conf => 350
Edit the extensions.conf file.
Under our internal context:
[internal]
exten => 350,1,MeetMe(350)
You can add so function by adding some line before connecting to the conference call. I learned the hard way not to add these lines after connecting the conference all. It did not work and I got an error message in the console that:
" No Zap channel available for conference, user introduction disabled"
So please put the call to the MeetMe conference room last.
exten => 350,1,Playback(conf-thereare)
exten => 350,n,MeetMeCount(350)
exten => 350,n,Playback(conf-peopleinconf)
exten => 350,n,MeetMe(350)
Line one plays a message that "There are currently..."
Line two plays the number of people in the conference call
Line three plays a message "...people in this conference"
Line for connects the call to the conference.
So the first caller dials 35o and hears:
"There are currently zero people in this conference"
The next person to call will here that there is one person, and so on.
Next time connecting to our intercom system.
Asterisk PBX System Install - 11 Overhead Paging
Asterisk PBX Install - Index
Friday, May 8, 2009
Asterisk PBX System Install - 09 Voicemail Macros
Issue:
Configuring Voicemail in Asterisk
Quick/Visual/Learning:
Voicemail is an important part of any phone system and it seems to work amazingly well in Asterisk with very little configuration.
First you need to define the mailboxes in the voicemail.conf file.
The sample configuration file has a lot of stuff in it but want we need to configure is towards the bottom of the file.
In the sample file there is an example under the context of [default] that looks like:
[default]
1234 => 4242,Example Mailbox,root@localhost
The 1234 part is the extension of the phone
4242 is the password (this can be updated by the user from his phone)
“Example Mailbox” is the name of the mailbox owner and is used in dial by name directory lookups (see page 156 of the book)
root@localhost is the email address where you want to send a copy of any voicemail messages.
Note for more information about sending to a pager etc. look at the book on page 155.
For my use I need to add voicemail for myself. I will do this under the context of [default] and not [internal] (I orignally thought that my voicemail context should match my phone extension context but not true apparently.) I discovered, if I changed the context here, the message waiting light on my phone did not work. (I think the fix for that is to change the mailbox=207 in the sip.conf file to mailbox=207@internal, more on that below)
I add the following line to the voicemail.conf file.
207 => 1234,Jimmy Ezell,jezell@company.com
Pretty simple.
For each additional mailbox I just need to add another line under the [default] context.
Note - The ability to forward voice mail messages to a email account is great but if you need to look for a voicemail message they are stored in: /var/spool/asterisk/voicemail/ContextName/Extension/INBOX
Now we need to make some changes to the extension.conf dialplan file to make use of the voicemail.
To do this we use the voicemail() application like this:
Voicemail(207@default,u)
This will send callers to my voicemail and play the unavailable message. That is what the u means. But what if I want to play the busy message? Use a b instead of the u.
What I really want is for Asterisk to play correct message depending on if I am busy (on the phone) or unavailable (away from my desk). That requires a little programming and that is what we are going to look at now.
First I will show you what gets added and then explain it. Then we will look at a way of creating a macro so that we do not have to type this for each one of our phone extensions.
[internal]
exten => 207,1,Dial(SIP/207,10)
exten => 207,n,GotoIf($["${DIALSTATUS}" = "BUSY"]?busy:unavail)
exten => 207,n(unavail),Voicemail(207@default,u)
exten => 207,n,Hangup()
exten => 207,n(busy),Voicemail(207@default,b)
exten => 207,n,Hangup()
The first part you should know. There is the context of [internal] and the command to dial the phone.
You need to know that if Asterisk fails to connect to my phone it saves the reason in a variable called DIALSTATUS. This happens automatically.
Now if the phone does not pickup we go to the next line with the GotoIf command. The GotoIf command is going to allow us to control what happens next.
GotoIf(Expression?TrueDestination,FalseDestination)
Expression is going to be a comparison test follow by a question mark.
TrueDestinaiton and FalseDestination is going to be a lable that points to another line of the dialplan.
Expressions look like this $[expression], where the expression might be comparing two things like, is DIALSTATUS equal to BUSY? Or something like:
$[DIALSTATUS = “BUSY”]. The BUSY in quotes is what I am checking for.
This expression is not quite right yet. Remember that DIALSTATUS is a variable and we have to write it like this to get the contents of a variable - ${DIALSTATUS}.
So now after replacing DIALSTATUS with $[DIALSTATUS]we have:
$[${DIALSTATUS} = “BUSY”]
This is the expression that will compare the contents of the variable DIALSTATUS with the value of BUSY.
Here is the whole of line 2 for you to look at again.
exten => 207,n,GotoIf($["${DIALSTATUS}" = "BUSY"]?busy:unavail)
If DIALSTATUS is equal to BUSY we are going to go to the TrueDestination (busy) but is it is not equal to BUSY we are going to go to the FalseDestination (unavail).
You can see that (busy) is on the 5th line of our exten 207 dialplan.
exten => 207,n(busy),Voicemail(207@default,b)
So if line 2 is true we jump down to line 5 and we call the Voicemail application and request the busy greeting message.
On the other hand if line 2 is false we jump down to line 3.
exten => 207,n(unavail),Voicemail(207@default,u)
This is where you see the label (unavail) and call the Voicemail application and request the unavailable message.
Great so now Asterisk is able to decide which Voicemail message to play based on whether or not we are on the phone. That is great but I don’t want to have to type all those lines for each extension. That is where macros come in.
Macros are special contexts sections of the extensions.conf file. You start a macro context with the word macro followed by a dash (-) and the name of the macro. So our voicemail macro might start like this:
[macro-voicemail]
The s extension is the only one you can have in the a macro section.
To call a macro you use the Macro() application like this:
[internal]
exten => 207,1,Macro(voicemail,207)
So I replaced 6 lines with one single line that is calling my Macro named “voicemail” and passing it a variable which is my phone extension number “207”.
The Macro will look almost the same as the 6 lines I replaced.
[macro-voicemail]
exten => s,1,Dial(SIP/${ARG1},10)
exten => s,n,GotoIf($["${DIALSTATUS}" = "BUSY"]?busy:unavail)
exten => s,n(unavail),VoiceMail(${MACRO_EXTEN}@default,u)
exten => s,n,Hangup()
exten => s,n(busy),VoiceMail(${MACRO_EXTEN}@default,b)
exten => s,n,Hangup()
Here:
exten=>207 was replaced with the exten=>s (only s is allowed in a macro)
SIP/207 was replaced with SIP/${ARG1}, (ARG1 is the extension number passed to the macro)
207@default was replaced with ${MACRO_EXTEN}@default (Extension the macro was called from)
ARG1 and MACRO_EXTEN hold the same data so I really don't need both, but you can see that there are two ways to get the extension. One way is to pass it into the macro or else use the MACRO_EXTEN. MACRO_EXTEN is automatically loaded by Asterisk with the value of the extension that called the macro.
So with this macro I only need to add one line to the extensions.conf file. So I might add 3 phones under context [internal] like this:
exten => 207,1,Macro(voicemail,207)
exten=> 208,1,Macro(voicemail,208)
exten=> 209,1,Macro(voicemail,209)
To get the messsage waiting light to work you need to add a line to the sip.conf file.
Mailbox=207
If I had used a different voicmail.conf context, other then default, I would have to specify the context like:
mailbox=207@WhatEverTheContextName
Now we need to go to the asterisk console and run the command:
> reload (that will load the voicemail.conf changes as well as the other changes we made)
Should be able to call the extension and leave a voicemail message now.
Back in post 5 we configured the cisco sip dialplan to dial 500. We also configured the SIPDefault.cnf file to assign this number to the message button on the cisco phones.
This is what I am going to setup as now as the number to check voicemail.
In the extensions.conf file:
exten => 500,1,VoiceMailMain(${CALLERID(num)}@default)
500 will now dial voicemail. The CALLERID(num) will match the number I am calling from so that I do not manually have to enter the mailbox number. I will just be prompted for the password.
Next time call parking and MeetMe conference Calls
Asterisk PBX System Install - 10 Conference And Parked Calls
Asterisk PBX Install - Index
Configuring Voicemail in Asterisk
Quick/Visual/Learning:
Voicemail is an important part of any phone system and it seems to work amazingly well in Asterisk with very little configuration.
First you need to define the mailboxes in the voicemail.conf file.
The sample configuration file has a lot of stuff in it but want we need to configure is towards the bottom of the file.
In the sample file there is an example under the context of [default] that looks like:
[default]
1234 => 4242,Example Mailbox,root@localhost
The 1234 part is the extension of the phone
4242 is the password (this can be updated by the user from his phone)
“Example Mailbox” is the name of the mailbox owner and is used in dial by name directory lookups (see page 156 of the book)
root@localhost is the email address where you want to send a copy of any voicemail messages.
Note for more information about sending to a pager etc. look at the book on page 155.
For my use I need to add voicemail for myself. I will do this under the context of [default] and not [internal] (I orignally thought that my voicemail context should match my phone extension context but not true apparently.) I discovered, if I changed the context here, the message waiting light on my phone did not work. (I think the fix for that is to change the mailbox=207 in the sip.conf file to mailbox=207@internal, more on that below)
I add the following line to the voicemail.conf file.
207 => 1234,Jimmy Ezell,jezell@company.com
Pretty simple.
For each additional mailbox I just need to add another line under the [default] context.
Note - The ability to forward voice mail messages to a email account is great but if you need to look for a voicemail message they are stored in: /var/spool/asterisk/voicemail/ContextName/Extension/INBOX
Now we need to make some changes to the extension.conf dialplan file to make use of the voicemail.
To do this we use the voicemail() application like this:
Voicemail(207@default,u)
This will send callers to my voicemail and play the unavailable message. That is what the u means. But what if I want to play the busy message? Use a b instead of the u.
What I really want is for Asterisk to play correct message depending on if I am busy (on the phone) or unavailable (away from my desk). That requires a little programming and that is what we are going to look at now.
First I will show you what gets added and then explain it. Then we will look at a way of creating a macro so that we do not have to type this for each one of our phone extensions.
[internal]
exten => 207,1,Dial(SIP/207,10)
exten => 207,n,GotoIf($["${DIALSTATUS}" = "BUSY"]?busy:unavail)
exten => 207,n(unavail),Voicemail(207@default,u)
exten => 207,n,Hangup()
exten => 207,n(busy),Voicemail(207@default,b)
exten => 207,n,Hangup()
The first part you should know. There is the context of [internal] and the command to dial the phone.
You need to know that if Asterisk fails to connect to my phone it saves the reason in a variable called DIALSTATUS. This happens automatically.
Now if the phone does not pickup we go to the next line with the GotoIf command. The GotoIf command is going to allow us to control what happens next.
GotoIf(Expression?TrueDestination,FalseDestination)
Expression is going to be a comparison test follow by a question mark.
TrueDestinaiton and FalseDestination is going to be a lable that points to another line of the dialplan.
Expressions look like this $[expression], where the expression might be comparing two things like, is DIALSTATUS equal to BUSY? Or something like:
$[DIALSTATUS = “BUSY”]. The BUSY in quotes is what I am checking for.
This expression is not quite right yet. Remember that DIALSTATUS is a variable and we have to write it like this to get the contents of a variable - ${DIALSTATUS}.
So now after replacing DIALSTATUS with $[DIALSTATUS]we have:
$[${DIALSTATUS} = “BUSY”]
This is the expression that will compare the contents of the variable DIALSTATUS with the value of BUSY.
Here is the whole of line 2 for you to look at again.
exten => 207,n,GotoIf($["${DIALSTATUS}" = "BUSY"]?busy:unavail)
If DIALSTATUS is equal to BUSY we are going to go to the TrueDestination (busy) but is it is not equal to BUSY we are going to go to the FalseDestination (unavail).
You can see that (busy) is on the 5th line of our exten 207 dialplan.
exten => 207,n(busy),Voicemail(207@default,b)
So if line 2 is true we jump down to line 5 and we call the Voicemail application and request the busy greeting message.
On the other hand if line 2 is false we jump down to line 3.
exten => 207,n(unavail),Voicemail(207@default,u)
This is where you see the label (unavail) and call the Voicemail application and request the unavailable message.
Great so now Asterisk is able to decide which Voicemail message to play based on whether or not we are on the phone. That is great but I don’t want to have to type all those lines for each extension. That is where macros come in.
Macros are special contexts sections of the extensions.conf file. You start a macro context with the word macro followed by a dash (-) and the name of the macro. So our voicemail macro might start like this:
[macro-voicemail]
The s extension is the only one you can have in the a macro section.
To call a macro you use the Macro() application like this:
[internal]
exten => 207,1,Macro(voicemail,207)
So I replaced 6 lines with one single line that is calling my Macro named “voicemail” and passing it a variable which is my phone extension number “207”.
The Macro will look almost the same as the 6 lines I replaced.
[macro-voicemail]
exten => s,1,Dial(SIP/${ARG1},10)
exten => s,n,GotoIf($["${DIALSTATUS}" = "BUSY"]?busy:unavail)
exten => s,n(unavail),VoiceMail(${MACRO_EXTEN}@default,u)
exten => s,n,Hangup()
exten => s,n(busy),VoiceMail(${MACRO_EXTEN}@default,b)
exten => s,n,Hangup()
Here:
exten=>207 was replaced with the exten=>s (only s is allowed in a macro)
SIP/207 was replaced with SIP/${ARG1}, (ARG1 is the extension number passed to the macro)
207@default was replaced with ${MACRO_EXTEN}@default (Extension the macro was called from)
ARG1 and MACRO_EXTEN hold the same data so I really don't need both, but you can see that there are two ways to get the extension. One way is to pass it into the macro or else use the MACRO_EXTEN. MACRO_EXTEN is automatically loaded by Asterisk with the value of the extension that called the macro.
So with this macro I only need to add one line to the extensions.conf file. So I might add 3 phones under context [internal] like this:
exten => 207,1,Macro(voicemail,207)
exten=> 208,1,Macro(voicemail,208)
exten=> 209,1,Macro(voicemail,209)
To get the messsage waiting light to work you need to add a line to the sip.conf file.
Mailbox=207
If I had used a different voicmail.conf context, other then default, I would have to specify the context like:
mailbox=207@WhatEverTheContextName
Now we need to go to the asterisk console and run the command:
> reload (that will load the voicemail.conf changes as well as the other changes we made)
Should be able to call the extension and leave a voicemail message now.
Back in post 5 we configured the cisco sip dialplan to dial 500. We also configured the SIPDefault.cnf file to assign this number to the message button on the cisco phones.
This is what I am going to setup as now as the number to check voicemail.
In the extensions.conf file:
exten => 500,1,VoiceMailMain(${CALLERID(num)}@default)
500 will now dial voicemail. The CALLERID(num) will match the number I am calling from so that I do not manually have to enter the mailbox number. I will just be prompted for the password.
Next time call parking and MeetMe conference Calls
Asterisk PBX System Install - 10 Conference And Parked Calls
Asterisk PBX Install - Index
Friday, May 1, 2009
Asterisk PBX System Install - 08 Outbound Calls
Issue: Last time we got inbound calls working and it is time to enable outbound calls.
Quick/Visual/Learning:
In our last post we already configured the Cisco 1760 router outbound calls. It was the section of the configuration that looked like:
dial-peer voice 100 pots destination-pattern .T port 0/0 forward-digits all
Where .T is a wildcard that matches all numbers, so Cisco should pass along whatever numbers we send it to our external phone line. Now we just need to tell Asterisk what to send it.
For this I am working again off of Chapter 5 of the book, which is “Dialplan Basics” to learn about pattern matching and variables.
Because we do not know what external number is going to be dialed, we have to get Asterisk to recognize a pattern of numbers that will signal that this is an outside call. We also have to capture what number was dialed and pass that along to the Cisco switch, which is stored in a variable.
Variables are just buckets that hold a piece of information, such as a name or a number. Among other things variables simplify changes. For example if you need to change a sip device and you have called it in several locations of a dialplan then you have to change it in each location. For starters I am going to create a global (seen by the whole dialplan) variable that points to my outbound sip device. The [globals] context is a special context name were you can put these types of variables. Also note that variables are case sensitive.
[globals]
OUTBOUNDTRUNK=SIP/Cisco1760
This sets the contents of our OUTBOUNDTRUNK bucket (variable) to be the name of the Cisco router that I configured in the sip.conf file last time.
To get the contents out of a variable you have to write it like this ${VaribleName}. So per our example, we can use ${OUTBOUNDTRUNK} anywhere in our dialplan where we would normally put the text SIP/Cisco1760.
Now I will look at pattern matching. A typical way of calling an outside number is to dial 9 to get an outside line and then to dial the 7-digit local phone number. I would like Asterisk to match any number that starts with 9 and is followed by 7 digits, like 9XXXXXXX.
To do this you start your pattern with an underscore, and enter your pattern. X matches any number, Z matches 1-9, and N matches 2-9.
So to match a local number the pattern would look like:
_9NXXXXXX
After the 9 we are just going to match numbers 2-9 as a 1 after then 9 would be the pattern for a long-distance call.
One last bit is that we need to pass the number that was dialed to the Cisco 1760 so that the call can be processed. Asterisk has a built in variable that stores this information for us which is ${EXTEN}. We want to pass alone the phone number but not the leading 9, so to strip that off we use ${EXTEN:1}. The 1 says to start with the second number that was dialed. This is position one of the variable. That is a bit confusing but the positions of the variable start with zero like this: 012345678 so position 0 would be the leading 9 and position 1 is the first digit of our local phone number.
Now we should have enough information to update our dialplan.
[outbound-local]
exten => _9NXXXXXX,1,Dial(${OUTBOUNDTRUNK}/${EXTEN:1})
exten => _9NXXXXXX,n,Congestion()
exten => _9NXXXXXX,n,Hangup()
exten => 911,1,Dial(${OUTBOUNDTRUNK}/911)
exten => 9911,1,Dial(${OUTBOUNDTRUNK}/911)
Here we are going to match any local phone number and dial out using our outbound device (Cisco 1760). If this fails for some reason the next step is Congestion(), which play a fast busy tone, and the last step is to hang up the line.
Also we have the options for dialing 911 configured. This is set to work with or without dialing 9 first for an outside line (someone in an emergency might for get to dial 9 first).
Remember that ignorepat is this section of the book does not work with our Cisco phones and you have to use the DIALTEMPLATE file to keep dial tone after pressing 9 (see Asterisk PBX System Install - 05 Cisco SIP Phone)
Our outbound dialing has it’s own context [outbound-local]. Remember contexts are separate from each other. We want our internal users to be able to use this [outbound-loca] context so we need to include it in our [internal] context.
[internal]
include => outbound-local
Time to reload the dialplan.
#asterisk –r
>dialplan reload
Now with these changes we should be able to make an outbound call.
You can also add long distance and 800 number dialing by adding a context like:
[outbound-long-distance]
exten => _91NXXNXXXXXX,1,Dial(${OUTBOUNDTRUNK}/${EXTEN:1})
exten => _91NXXNXXXXXX,n,Congestion()
exten => _91NXXNXXXXXX,n,Hangup()
Remember to include it in the internal context as well.
Next time Voicemail
Asterisk PBX System Install - 09 Voicemail Macros
Asterisk PBX Install - Index
Quick/Visual/Learning:
In our last post we already configured the Cisco 1760 router outbound calls. It was the section of the configuration that looked like:
dial-peer voice 100 pots destination-pattern .T port 0/0 forward-digits all
Where .T is a wildcard that matches all numbers, so Cisco should pass along whatever numbers we send it to our external phone line. Now we just need to tell Asterisk what to send it.
For this I am working again off of Chapter 5 of the book, which is “Dialplan Basics” to learn about pattern matching and variables.
Because we do not know what external number is going to be dialed, we have to get Asterisk to recognize a pattern of numbers that will signal that this is an outside call. We also have to capture what number was dialed and pass that along to the Cisco switch, which is stored in a variable.
Variables are just buckets that hold a piece of information, such as a name or a number. Among other things variables simplify changes. For example if you need to change a sip device and you have called it in several locations of a dialplan then you have to change it in each location. For starters I am going to create a global (seen by the whole dialplan) variable that points to my outbound sip device. The [globals] context is a special context name were you can put these types of variables. Also note that variables are case sensitive.
[globals]
OUTBOUNDTRUNK=SIP/Cisco1760
This sets the contents of our OUTBOUNDTRUNK bucket (variable) to be the name of the Cisco router that I configured in the sip.conf file last time.
To get the contents out of a variable you have to write it like this ${VaribleName}. So per our example, we can use ${OUTBOUNDTRUNK} anywhere in our dialplan where we would normally put the text SIP/Cisco1760.
Now I will look at pattern matching. A typical way of calling an outside number is to dial 9 to get an outside line and then to dial the 7-digit local phone number. I would like Asterisk to match any number that starts with 9 and is followed by 7 digits, like 9XXXXXXX.
To do this you start your pattern with an underscore, and enter your pattern. X matches any number, Z matches 1-9, and N matches 2-9.
So to match a local number the pattern would look like:
_9NXXXXXX
After the 9 we are just going to match numbers 2-9 as a 1 after then 9 would be the pattern for a long-distance call.
One last bit is that we need to pass the number that was dialed to the Cisco 1760 so that the call can be processed. Asterisk has a built in variable that stores this information for us which is ${EXTEN}. We want to pass alone the phone number but not the leading 9, so to strip that off we use ${EXTEN:1}. The 1 says to start with the second number that was dialed. This is position one of the variable. That is a bit confusing but the positions of the variable start with zero like this: 012345678 so position 0 would be the leading 9 and position 1 is the first digit of our local phone number.
Now we should have enough information to update our dialplan.
[outbound-local]
exten => _9NXXXXXX,1,Dial(${OUTBOUNDTRUNK}/${EXTEN:1})
exten => _9NXXXXXX,n,Congestion()
exten => _9NXXXXXX,n,Hangup()
exten => 911,1,Dial(${OUTBOUNDTRUNK}/911)
exten => 9911,1,Dial(${OUTBOUNDTRUNK}/911)
Here we are going to match any local phone number and dial out using our outbound device (Cisco 1760). If this fails for some reason the next step is Congestion(), which play a fast busy tone, and the last step is to hang up the line.
Also we have the options for dialing 911 configured. This is set to work with or without dialing 9 first for an outside line (someone in an emergency might for get to dial 9 first).
Remember that ignorepat is this section of the book does not work with our Cisco phones and you have to use the DIALTEMPLATE file to keep dial tone after pressing 9 (see Asterisk PBX System Install - 05 Cisco SIP Phone)
Our outbound dialing has it’s own context [outbound-local]. Remember contexts are separate from each other. We want our internal users to be able to use this [outbound-loca] context so we need to include it in our [internal] context.
[internal]
include => outbound-local
Time to reload the dialplan.
#asterisk –r
>dialplan reload
Now with these changes we should be able to make an outbound call.
You can also add long distance and 800 number dialing by adding a context like:
[outbound-long-distance]
exten => _91NXXNXXXXXX,1,Dial(${OUTBOUNDTRUNK}/${EXTEN:1})
exten => _91NXXNXXXXXX,n,Congestion()
exten => _91NXXNXXXXXX,n,Hangup()
Remember to include it in the internal context as well.
Next time Voicemail
Asterisk PBX System Install - 09 Voicemail Macros
Asterisk PBX Install - Index
Tuesday, April 28, 2009
Asterisk PBX System Install - 07 External Line
Issue:
Configure our Cisco 1760 router to connect inbond phone calls.
Quick/Visual/Learning:
Now to configure the Call router
Using a Cisco 1760 with 2 - 2 port FXO cards (For up to 4 analog phone lines)
Note there are 4 slots on the router and we have some 4 port cards. I assume that we could have up to 16 total phone lines connected to the router in that configuration.
For now I am just going to see if I can get one line working.
Router ip address in this case 172.17.2.1
One of the first problems I had was that as I was looking for help I saw some posts that I needed to configure the router like this:
voice service voip
allow-connections sip to sip
The Problem is allow-connections sip to sip was not an option on my router. It turns out I needed to update my router ios to something above version 12.4.15.T
I got 12.4.15.T.8 which requires 128 RAM and 32 Flash
You should be able to see all this informaiton about your router using command:
> show version
See January 23 post on loading IOS
Below are the bits of my router configuration associated with the voice connection.
An easy way to get these on your router is to enter config t mode on the router and copy the commands right into the command window. You may want to copy them a bit at a time instead of all at once so you can see if any errors show up.
I do not claim to be an expert on routing calls over the Cisco 1760 router. Below is what I came up with and it seems to work. If anyone has insight into what is or is not needed please feel free to submit a comment to this post. I put a few comments below to explain some of what I think is going one with this configuration.
This link was very useful in my testing.
-------------------------------------------------
voice call carrier capacity active
voice rtp send-recv
!
(I had to upgrade my IOS to get the sip to sip options you see below)
voice service voip
allow-connections h323 to sip
allow-connections sip to h323
allow-connections sip to sip
sip
bind control source-interface FastEthernet0/0
bind media source-interface FastEthernet0/0
no call service stop
!
!
voice statistics type csr
!
!
dial-control-mib retain-timer 180
dial-control-mib max-size 250
archive
log config
hidekeys
!
!
(below is the ip address of my Ethernet port on the 172.17.x.x subnet going over to the Cisco switch)
interface FastEthernet0/0
description Voice
ip address 172.17.2.1 255.255.0.0
speed 100
full-duplex
!
!
(connection plar 401 is the extension on the Asterisk server where the router will connect. The description is not needed but is here to remind us that 555.765.2211 is the number of the outside line that we are going to connect to the router. )
voice-port 0/0
input gain 6
output attenuation 0
echo-cancel erl worst-case 0
no vad
no comfort-noise
timing hookflash-out 50
connection plar 401
impedance complex2
description 555.765.2211
station-id name External Caller
station-id number 2211
!
!
dial-peer cor custom
!
!
!
(400 seem to be just an assigned number and I don’t think it matters which you use. Pattern 4.. means that I will be connection to a 3 digit extension starting with a 4. Target ip is the ip of my Asterisk server 172.17.1.31 and 5060 is the standard SIP port. Codec g711ulaw is the same ulaw protocol that we well be setting on Asterisk.)
dial-peer voice 400 voip
destination-pattern 4..
session protocol sipv2
session target ipv4:172.17.1.31:5060
session transport udp
incoming called-number .
dtmf-relay sip-notify rtp-nte
codec g711ulaw
no vad
!
(Distnation .T matches all numbers and is used for outbound calls)
dial-peer voice 100 pots
destination-pattern .T
port 0/0
forward-digits all
!
gateway
timer receive-rtp 1200
!
(sip-server below points to our Asterisk pbx)
sip-ua
retry invite 3
retry response 3
retry bye 3
retry cancel 3
timers trying 1000
sip-server ipv4:172.17.1.31
!
!
telephony-service
fxo hook-flash
max-conferences 4 gain -6
transfer-system full-blind
transfer-pattern ....
!
----------------------------------------------
On the Asterisk server we have to configure the sip.conf file to allow the 1760 router to connect over sip.
#vi sip.conf
i
[general]
[Cisco1760]
context=incoming_calls
type=friend
host=172.17.2.1
dtmfmode=rfc2833
disallow=all
allow=ulaw
insecure=very
[207]
context=internal
type=friend
disallow=all
allow=ulaw
host=dynamic
Esc-Key
:wq
You see above the new section added to the sip.conf file for the Cisco router. The section name "cisco1760" was just a name I picked. The context is different (incoming_calls not the context of internal we used on the phones) so that will need to be configured in the extensions.conf file. This keeps incoming calls separate from our internal phones. There are security reasons for doing it this way. Friend says we can send and receive calls, dtmfmode=rfc2833 allows key tones to get through, Host points to the ip address of the router and it is configured for ulaw which is the same as the router. The line insecure=very is important and needs to be there from what I read.
disallow all does not allow any codecs except for the one we specifically allow which is ulaw.
In extensions.conf we need to configure the incoming_calls context.
[globals]
[general]
[default]
[incoming_calls]
exten => 401,1,Answer
exten => 401,n,Background(main-menu)
exten => 401,n,WaitExten(15)
exten => 1,1,Dial(SIP/207,15)
exten => i,1,Playback(pbx-invalid)
exten => i,n,Goto(incoming_calls,401,1)
exten => t,1,Playback(vm-goodby)
exten => t,n,Hangup()
[internal]
exten => 401,1,Answer
exten => 401,n,Playback(tt-weasels)
exten => 401,n,Hangup()
[phones]
include => internal
Under incoming_calls I added extension 401 and it looks a lot like the 401 under the internal context but they are not the same. Incoming_call and internal contexts are completely separate areas of the dial plan. The calling plan defined under incoming_calls does not communicate with the plan under the internal context. So what does this do?
When the router connects to the Asterisk server as a sip device it is assigned to the incoming_calls context. The router then connects on extension 401 because that is what we configured it to do on the router configuration. The 401 extension program under the incoming_ calls context runs and answers the line. It will play back a message that says “Main Menu” and then it waits 15 seconds for someone to enter a number. It does not tell them what number to press because we have not set that part up yet. This is the bare beginnings of setting up a phone tree for routing calls. Looking at the dial plan you can see that extension 1 has been configured. If 1 is dialed during the waiting period the sip device 207 will be called and connected.
The other 2 extensions in the section are there to help in testing. The i extension is for invalid entries. This message gets played if someone enters a number for an undefined or invalid extension. The t extension is the time out action and just hangs up if no numbers are entered in the allotted time.
So we can use this to test by calling in from somewhere (cell phone maybe) on our outside line 555-765-2211 (of course this is not the real number I am using). I hear the “Main Menu” message. I dial 1 and the 207 phone on my desk rings and I can pick it up and talk pretty cool when you get that working for the first time.
Next time we will get outbound calls working
Asterisk PBX System Install - 08 Outbound Calls
Asterisk PBX Install - Index
Configure our Cisco 1760 router to connect inbond phone calls.
Quick/Visual/Learning:
Now to configure the Call router
Using a Cisco 1760 with 2 - 2 port FXO cards (For up to 4 analog phone lines)
Note there are 4 slots on the router and we have some 4 port cards. I assume that we could have up to 16 total phone lines connected to the router in that configuration.
For now I am just going to see if I can get one line working.
Router ip address in this case 172.17.2.1
One of the first problems I had was that as I was looking for help I saw some posts that I needed to configure the router like this:
voice service voip
allow-connections sip to sip
The Problem is allow-connections sip to sip was not an option on my router. It turns out I needed to update my router ios to something above version 12.4.15.T
I got 12.4.15.T.8 which requires 128 RAM and 32 Flash
You should be able to see all this informaiton about your router using command:
> show version
See January 23 post on loading IOS
Below are the bits of my router configuration associated with the voice connection.
An easy way to get these on your router is to enter config t mode on the router and copy the commands right into the command window. You may want to copy them a bit at a time instead of all at once so you can see if any errors show up.
I do not claim to be an expert on routing calls over the Cisco 1760 router. Below is what I came up with and it seems to work. If anyone has insight into what is or is not needed please feel free to submit a comment to this post. I put a few comments below to explain some of what I think is going one with this configuration.
This link was very useful in my testing.
-------------------------------------------------
voice call carrier capacity active
voice rtp send-recv
!
(I had to upgrade my IOS to get the sip to sip options you see below)
voice service voip
allow-connections h323 to sip
allow-connections sip to h323
allow-connections sip to sip
sip
bind control source-interface FastEthernet0/0
bind media source-interface FastEthernet0/0
no call service stop
!
!
voice statistics type csr
!
!
dial-control-mib retain-timer 180
dial-control-mib max-size 250
archive
log config
hidekeys
!
!
(below is the ip address of my Ethernet port on the 172.17.x.x subnet going over to the Cisco switch)
interface FastEthernet0/0
description Voice
ip address 172.17.2.1 255.255.0.0
speed 100
full-duplex
!
!
(connection plar 401 is the extension on the Asterisk server where the router will connect. The description is not needed but is here to remind us that 555.765.2211 is the number of the outside line that we are going to connect to the router. )
voice-port 0/0
input gain 6
output attenuation 0
echo-cancel erl worst-case 0
no vad
no comfort-noise
timing hookflash-out 50
connection plar 401
impedance complex2
description 555.765.2211
station-id name External Caller
station-id number 2211
!
!
dial-peer cor custom
!
!
!
(400 seem to be just an assigned number and I don’t think it matters which you use. Pattern 4.. means that I will be connection to a 3 digit extension starting with a 4. Target ip is the ip of my Asterisk server 172.17.1.31 and 5060 is the standard SIP port. Codec g711ulaw is the same ulaw protocol that we well be setting on Asterisk.)
dial-peer voice 400 voip
destination-pattern 4..
session protocol sipv2
session target ipv4:172.17.1.31:5060
session transport udp
incoming called-number .
dtmf-relay sip-notify rtp-nte
codec g711ulaw
no vad
!
(Distnation .T matches all numbers and is used for outbound calls)
dial-peer voice 100 pots
destination-pattern .T
port 0/0
forward-digits all
!
gateway
timer receive-rtp 1200
!
(sip-server below points to our Asterisk pbx)
sip-ua
retry invite 3
retry response 3
retry bye 3
retry cancel 3
timers trying 1000
sip-server ipv4:172.17.1.31
!
!
telephony-service
fxo hook-flash
max-conferences 4 gain -6
transfer-system full-blind
transfer-pattern ....
!
----------------------------------------------
On the Asterisk server we have to configure the sip.conf file to allow the 1760 router to connect over sip.
#vi sip.conf
i
[general]
[Cisco1760]
context=incoming_calls
type=friend
host=172.17.2.1
dtmfmode=rfc2833
disallow=all
allow=ulaw
insecure=very
[207]
context=internal
type=friend
disallow=all
allow=ulaw
host=dynamic
Esc-Key
:wq
You see above the new section added to the sip.conf file for the Cisco router. The section name "cisco1760" was just a name I picked. The context is different (incoming_calls not the context of internal we used on the phones) so that will need to be configured in the extensions.conf file. This keeps incoming calls separate from our internal phones. There are security reasons for doing it this way. Friend says we can send and receive calls, dtmfmode=rfc2833 allows key tones to get through, Host points to the ip address of the router and it is configured for ulaw which is the same as the router. The line insecure=very is important and needs to be there from what I read.
disallow all does not allow any codecs except for the one we specifically allow which is ulaw.
In extensions.conf we need to configure the incoming_calls context.
[globals]
[general]
[default]
[incoming_calls]
exten => 401,1,Answer
exten => 401,n,Background(main-menu)
exten => 401,n,WaitExten(15)
exten => 1,1,Dial(SIP/207,15)
exten => i,1,Playback(pbx-invalid)
exten => i,n,Goto(incoming_calls,401,1)
exten => t,1,Playback(vm-goodby)
exten => t,n,Hangup()
[internal]
exten => 401,1,Answer
exten => 401,n,Playback(tt-weasels)
exten => 401,n,Hangup()
[phones]
include => internal
Under incoming_calls I added extension 401 and it looks a lot like the 401 under the internal context but they are not the same. Incoming_call and internal contexts are completely separate areas of the dial plan. The calling plan defined under incoming_calls does not communicate with the plan under the internal context. So what does this do?
When the router connects to the Asterisk server as a sip device it is assigned to the incoming_calls context. The router then connects on extension 401 because that is what we configured it to do on the router configuration. The 401 extension program under the incoming_ calls context runs and answers the line. It will play back a message that says “Main Menu” and then it waits 15 seconds for someone to enter a number. It does not tell them what number to press because we have not set that part up yet. This is the bare beginnings of setting up a phone tree for routing calls. Looking at the dial plan you can see that extension 1 has been configured. If 1 is dialed during the waiting period the sip device 207 will be called and connected.
The other 2 extensions in the section are there to help in testing. The i extension is for invalid entries. This message gets played if someone enters a number for an undefined or invalid extension. The t extension is the time out action and just hangs up if no numbers are entered in the allotted time.
So we can use this to test by calling in from somewhere (cell phone maybe) on our outside line 555-765-2211 (of course this is not the real number I am using). I hear the “Main Menu” message. I dial 1 and the 207 phone on my desk rings and I can pick it up and talk pretty cool when you get that working for the first time.
Next time we will get outbound calls working
Asterisk PBX System Install - 08 Outbound Calls
Asterisk PBX Install - Index
Friday, April 24, 2009
Asterisk PBX System Install - 06 Two SIP Phones
Issue:
The goal for today is to be able to call another extension on the Asterisk server and talk to someone.
Quick/Visual/Learning:
The goal to have a phone connect to Asterisk and have Asterisk respond should have been accomplished last time.
The new goal is to have two ip phones talking to each other.
We well need a second IP phone configured for SIP.
This should be pretty easy since we got everything in place already in the last post.
Plug in the phone and get the MAC Address of the phone
Copy the MAC Address specific file we created last time (my example SIP000d28f35928.cnf)
Edit the copy to configure the names of the phone to be the new extension name (example replace 207 with 222)
Rename the copy to match the MAC Address of the new phone SIPXXXXXXXXXXXX.cnf (Replace Xs with MAC Address)
Now the phone should come up with SIP loaded and the correct extension name (example 222).
Just to test you may want to look at the ip address on the phone and verify that the Asterisk server can ping that address as we did last time.
Now the task is to configure Asterisk so the phones can call each other.
We need to change the sip.conf file to allow the new phone 222 to connect to Asterisk. These files are in the /etc/asterisk directory. Using vi to edit sip.conf we see the contents of the file on the screen. Get into the insert mode and add the same text for 222 as we have for 207
#vi sip.conf
i
[general]
[207]
context=internal
type=friend
disallow=all
allow=ulaw
host=dynamic
[222]
context=internal
type=friend
disallow=all
allow=ulaw
host=dynamic
Esc-Key
:wq
Connect to the Asterisk console and run the command
#asterisk -r
>sip reload
This loads our changes to the sip file. I am now able to dial extension 401 on the extension 222 phone and here the weasels message played but I still cannot dial the other phone extension because it has not been added to the extensions.conf file yet.
This is a good time to talk a bit more about the Dialplan (extensions.conf) file.
When you create an extension for a phone in the extensions.conf file you are creating a program that runs when the extension is called. Each step for our 207 example extension is defined like this:
exten => 207
The first step is always number 1 (must be labeled this way). You could number the next step 2 but instead you can use n for all the steps after 1 and Asterisk will just do them in order. That way you can move things around without having to renumber everything.
exten=>207,1
Next comes the action or program to be performed (Answer the call in this case) :
exten=>207,1,Answer()
Answer does not require any extra information to work. When we dial the extension in this case we do not want Asterisk to Answer we want it to connect us to another phone we are dialing. You do this with the Dial() application and that does require more information.
Inside the parenthasis be can put up to 4 arguments.
Dial(Destination, timeout, option, URL)
All we are going to use is a destination and a timeout.
exten=>207,1,Dial(SIP/207,15)
This tells asterisk to ring the sip phone 207 that is defined in our sip.conf file for 15 seconds. If no one answers the phone the next step will be to hangup the line. (Later we will look at things like voicemail.)
Now lets update our extensions.conf file.
Get out of Asterisk console
>exit
Edit the extensions.conf file and add the phone extensions as you see below in the internal context (section) of the file.
#vi extensions.conf
[globals]
[general]
[default]
[incoming_calls]
[internal]
exten => 207,1,Dial(SIP/207,10)
exten => 207,n,Hangup()
exten => 222,1,Dial(SIP/222,10)
exten => 222,n,Hangup()
exten => 401,1,Answer()
exten => 401,n,Playback(tt-weasels)
exten=> 401,n,Hangup()
[phones]
include => internal
Esc-Key
:wq
Now reload this configuration in Asterisk. Go to the Asterisk console prompt and issue the command dialplan reload.
>dialplan reload
Since we have verbose turned on you should see the plan load with no error messages. These changes tell Asterisk what to do when the phone extension is dialed. When you pick up the phone on 222 and dial 207 Asterisk will connect or dial the SIP device 207 we created in the sip.conf file and complete the call connection. The same thing will happen if we pick up the 207 phone and call 222.
Next time we will look at connecting to an external phone line.
Asterisk PBX System Install - 07 External Line
Asterisk PBX Install - Index
The goal for today is to be able to call another extension on the Asterisk server and talk to someone.
Quick/Visual/Learning:
The goal to have a phone connect to Asterisk and have Asterisk respond should have been accomplished last time.
The new goal is to have two ip phones talking to each other.
We well need a second IP phone configured for SIP.
This should be pretty easy since we got everything in place already in the last post.
Plug in the phone and get the MAC Address of the phone
Copy the MAC Address specific file we created last time (my example SIP000d28f35928.cnf)
Edit the copy to configure the names of the phone to be the new extension name (example replace 207 with 222)
Rename the copy to match the MAC Address of the new phone SIPXXXXXXXXXXXX.cnf (Replace Xs with MAC Address)
Now the phone should come up with SIP loaded and the correct extension name (example 222).
Just to test you may want to look at the ip address on the phone and verify that the Asterisk server can ping that address as we did last time.
Now the task is to configure Asterisk so the phones can call each other.
We need to change the sip.conf file to allow the new phone 222 to connect to Asterisk. These files are in the /etc/asterisk directory. Using vi to edit sip.conf we see the contents of the file on the screen. Get into the insert mode and add the same text for 222 as we have for 207
#vi sip.conf
i
[general]
[207]
context=internal
type=friend
disallow=all
allow=ulaw
host=dynamic
[222]
context=internal
type=friend
disallow=all
allow=ulaw
host=dynamic
Esc-Key
:wq
Connect to the Asterisk console and run the command
#asterisk -r
>sip reload
This loads our changes to the sip file. I am now able to dial extension 401 on the extension 222 phone and here the weasels message played but I still cannot dial the other phone extension because it has not been added to the extensions.conf file yet.
This is a good time to talk a bit more about the Dialplan (extensions.conf) file.
When you create an extension for a phone in the extensions.conf file you are creating a program that runs when the extension is called. Each step for our 207 example extension is defined like this:
exten => 207
The first step is always number 1 (must be labeled this way). You could number the next step 2 but instead you can use n for all the steps after 1 and Asterisk will just do them in order. That way you can move things around without having to renumber everything.
exten=>207,1
Next comes the action or program to be performed (Answer the call in this case) :
exten=>207,1,Answer()
Answer does not require any extra information to work. When we dial the extension in this case we do not want Asterisk to Answer we want it to connect us to another phone we are dialing. You do this with the Dial() application and that does require more information.
Inside the parenthasis be can put up to 4 arguments.
Dial(Destination, timeout, option, URL)
All we are going to use is a destination and a timeout.
exten=>207,1,Dial(SIP/207,15)
This tells asterisk to ring the sip phone 207 that is defined in our sip.conf file for 15 seconds. If no one answers the phone the next step will be to hangup the line. (Later we will look at things like voicemail.)
Now lets update our extensions.conf file.
Get out of Asterisk console
>exit
Edit the extensions.conf file and add the phone extensions as you see below in the internal context (section) of the file.
#vi extensions.conf
[globals]
[general]
[default]
[incoming_calls]
[internal]
exten => 207,1,Dial(SIP/207,10)
exten => 207,n,Hangup()
exten => 222,1,Dial(SIP/222,10)
exten => 222,n,Hangup()
exten => 401,1,Answer()
exten => 401,n,Playback(tt-weasels)
exten=> 401,n,Hangup()
[phones]
include => internal
Esc-Key
:wq
Now reload this configuration in Asterisk. Go to the Asterisk console prompt and issue the command dialplan reload.
>dialplan reload
Since we have verbose turned on you should see the plan load with no error messages. These changes tell Asterisk what to do when the phone extension is dialed. When you pick up the phone on 222 and dial 207 Asterisk will connect or dial the SIP device 207 we created in the sip.conf file and complete the call connection. The same thing will happen if we pick up the 207 phone and call 222.
Next time we will look at connecting to an external phone line.
Asterisk PBX System Install - 07 External Line
Asterisk PBX Install - Index
Tuesday, April 21, 2009
Asterisk PBX System Install - 05 Cisco SIP Phone
Issue:
We have Cisco phones and need to load the SIP protocol on them and test Asterisk.
Quick/Visual/Learning:
The Cisco phones come loaded with the Cisco proprietary SKINNY protocol loaded. Asterisk apparently does support SKINNY but has better support for SIP. To load SIP on the phone we need to get the SIP files and use a TFTP server to load them.
Here is a link to information that may be helpful if you have problems.
Another good link. And antoher.
If you have access to Cisco support you can get the sip files from them. I got my files from a phone vendor when we were looking at converting our phones over to another sip based phone system.
Once SIP is loaded you are not required to have the TFTP server as you can manually configure the phone but TFTP and DHCP can help to automate the process where there are a lot of changes going on.
For the TFTP server I am going to use TFTPD32, which is an open source TFTP server that runs on windows. It is very easy to use and includes a DHCP server, which allow you to automatically configure the TFTP server settings. You can download it here
Note - If you want to run it all on the Linux CentOS box you can look in the book in chapter 4. There is a section on configuring Cisco 7960 Telephone that tells you how to install and configure a tftp-server. Remember to put the MAC addresses in ALL CAPS.cnf
I will load my downloaded TFTP server on a laptop and plug both the phone and the laptop running TFTP server into my test switch that is not on the network.
OK after you have downloaded the TFTP and put it on a windows machine it is time to configure it. Run the install program. Click Next
This will bring up a setting screen.
Select the Network Configuration option and scroll down to see the MAC Address of the phone and write it down. It will be a 12 digit hexadecimal number that looks like this example here – 000d:28f3:5928
Now we need to configure a configuration file for the Phone:
Using Notepad create a file in this format: SIPMacAddress.cnf
For my example the file will be called SIP000d28f35928.cnf (SIP and address without the colons)
Note here that windows thinks that files that end in .cnf are SpeedDial files and you can not open them by browsing to them in Windows Explorer and opening them. You need to open notepad first and select to see all files and pick the .cnf file that way. Very annoying.
When you save these files in Notepad the first time put the name in "" otherwise it may save as a .txt file which is not what we want. I know, what a pain, if you have a better editor handy feel free to use that one instead.
Here is the contents of my SIP000d228f35928.cnf file:
###############
# Line 1 Setting
line1_name:207
line1_shortname:207
line1_displayname:207
line1_authname:207
#line1_password:takeaguess
################
The name 207 has to be the same name that is in my sip.conf file on the Asterisk server (see previous post). I have made all these names the same as the extension of phone 207.
Note that # indicates when a line is just a comment field and right now I have the password commented out for now.
Another text file for the tftp root directory is SIPDefault.cnf and here is what is contains:
###########################
#Image Version
image_version:POS3-07-5-00 ;
#Proxy Server (this is the ip address of our Asterisk server)
proxy1_address: 172.17.1.31
#Message button assignment to extension 500
messagees_uri: “500”
#Time server ip and time zone settings
sntp_server: 172.22.1.30
time_zone: PST
#Template for phone dialing plan
dial_template: DIALPLAN
###################################
Here is a link to information about what you can put in the SIPDefault.cnf file
While we are at it, another text file to be configured is the DIALPLAN.xml file. This is the file that you see in the dial_template entry above. I still have problems putting code in the blog sometimes so here is a picture of the text in the DIALPLAN.xml file:
We have Cisco phones and need to load the SIP protocol on them and test Asterisk.
Quick/Visual/Learning:
The Cisco phones come loaded with the Cisco proprietary SKINNY protocol loaded. Asterisk apparently does support SKINNY but has better support for SIP. To load SIP on the phone we need to get the SIP files and use a TFTP server to load them.
Here is a link to information that may be helpful if you have problems.
Another good link. And antoher.
If you have access to Cisco support you can get the sip files from them. I got my files from a phone vendor when we were looking at converting our phones over to another sip based phone system.
Once SIP is loaded you are not required to have the TFTP server as you can manually configure the phone but TFTP and DHCP can help to automate the process where there are a lot of changes going on.
For the TFTP server I am going to use TFTPD32, which is an open source TFTP server that runs on windows. It is very easy to use and includes a DHCP server, which allow you to automatically configure the TFTP server settings. You can download it here
Note - If you want to run it all on the Linux CentOS box you can look in the book in chapter 4. There is a section on configuring Cisco 7960 Telephone that tells you how to install and configure a tftp-server. Remember to put the MAC addresses in ALL CAPS.cnf
I will load my downloaded TFTP server on a laptop and plug both the phone and the laptop running TFTP server into my test switch that is not on the network.
OK after you have downloaded the TFTP and put it on a windows machine it is time to configure it. Run the install program. Click Next
 Except the default TFTP directory location (or change it if you like). Click Install
 When it completes click close.
Put SIP configuration files from Cisco in the TFTP server directory (c:\program files\tftpd32 in my case).
The files I am putting in there from Cisco are (not sure if they are all needed):
P003-07-5-00.bin
P003-07-5-00.sbn
P0S3-07-5-00.bin
P0S3-07-5-00.loads
P0S3-07-5-00.sb2
Start the TFTP server.
In my case I go the start menu and start the TFTPD32 application.
On the TFTP Server Tab I can see the interface and it should be on the same subnet as your Asterisk Server (my example 172.17.X.X).
On the DHCP tab I give it a starting address to hand out to the phones and a pool size. I set it to 10 in this case.
Another important thing to notice here is in the Additional Option settings. Option 66 is the DHCP option that assigns a default tftp server. Here I set the default tftp server to be this one that I am configuring. The window is not big enough to show the whole IP address but it is the same as what is above in the server interface window. This is what tells the phone where to go to find the new configuration files so this is quite important.
At the bottom of the screen click on the setting button. Uncheck the DHCP box to “Ping Address before assignment”. This seems to cause a strange issue where DHCP fills up with requests from the MAC address 46-46-3A-46-46-3A (46:46:3A:46:46:3A 46463A46463A). I think this may be a bug with TFTPD32.
Click on the save button and leave the server up and running.
There are a couple of files that I need to create as well with a text editor (I will use notepad). These text files go into the root of the TFTP server directory as well.
First I need to get the hard coded address of the phone I will be configuring.
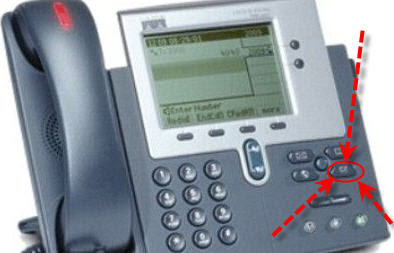
Plug an Ethernet cable into the 10/100 sw port on the back of the phone (if you use the wrong port it will not power up). Plug the phone into the Cisco switch. The switch provides power over Ethernet (POE) to power up the phone. Once the screen comes on you will see it trying to configure itself (never ending loop). Press the button with a check mark inside a square on it. See the picture below which points out the button.

This will bring up a setting screen.
Select the Network Configuration option and scroll down to see the MAC Address of the phone and write it down. It will be a 12 digit hexadecimal number that looks like this example here – 000d:28f3:5928
Now we need to configure a configuration file for the Phone:
Using Notepad create a file in this format: SIPMacAddress.cnf
For my example the file will be called SIP000d28f35928.cnf (SIP and address without the colons)
Note here that windows thinks that files that end in .cnf are SpeedDial files and you can not open them by browsing to them in Windows Explorer and opening them. You need to open notepad first and select to see all files and pick the .cnf file that way. Very annoying.
When you save these files in Notepad the first time put the name in "" otherwise it may save as a .txt file which is not what we want. I know, what a pain, if you have a better editor handy feel free to use that one instead.
Here is the contents of my SIP000d228f35928.cnf file:
###############
# Line 1 Setting
line1_name:207
line1_shortname:207
line1_displayname:207
line1_authname:207
#line1_password:takeaguess
################
The name 207 has to be the same name that is in my sip.conf file on the Asterisk server (see previous post). I have made all these names the same as the extension of phone 207.
Note that # indicates when a line is just a comment field and right now I have the password commented out for now.
Another text file for the tftp root directory is SIPDefault.cnf and here is what is contains:
###########################
#Image Version
image_version:POS3-07-5-00 ;
#Proxy Server (this is the ip address of our Asterisk server)
proxy1_address: 172.17.1.31
#Message button assignment to extension 500
messagees_uri: “500”
#Time server ip and time zone settings
sntp_server: 172.22.1.30
time_zone: PST
#Template for phone dialing plan
dial_template: DIALPLAN
###################################
Here is a link to information about what you can put in the SIPDefault.cnf file
While we are at it, another text file to be configured is the DIALPLAN.xml file. This is the file that you see in the dial_template entry above. I still have problems putting code in the blog sometimes so here is a picture of the text in the DIALPLAN.xml file:

Update:
I found out that dial tone is provided by the SIP phone and n0t by Asterisk so you can not use ignorpat => 9 (as mentioned in the book) to keep the dial tone after pressing 9. To get dial tone to continue after pressing 9 you need to add a coma after the nine in this DIALPLAN.xml file:
"9,1.........."TIMEOUT="0" /
"9,......."TIMEOUT="0" /
Without this file the phone will wait a long time before trying to dial the numbers you enter.
This xml file tells the phone to not wait before dialing a 3-digit extension starting with a 2.
Also does not wait on 500, which will be our voicemail number, and numbers that we will later use for dialing outside numbers.
This gets saved into the root of our TFTP server as well.
One last file that needs to be there is a very small text file called "OS79XX.txt". The name should be just as you see it. OS79 followed by 2 Xs .txt.
In that file is a single line:
P003-07-5-00
This tells the phone what version of the .bin and .sbn files to load.
With the TFTP server running and plugged into my Cisco switch, I again plug my phone into the Cisco switch.
Now the phone configures itself. It takes a couple minutes so be patient but it should now load SIP.
When it is done the screen will display the name of the phone and SIP in the upper right corner (example 207SIP)
You can press the CheckMark button you used above and check that it is configured correctly.
Under Network Setup:
DHCP server should point to the one running on our tftp server (example 172.17.1.40)
IP Address should be in the range we assigned to the DHCP server pool above. (example 172.17.1.50)
Mask should be what was set on the DHCP server (example 255.255.0.0)
And the TFTP server should point to the one we configured. (example 172.17.1.40)
On phone as well we can get out of network configuration and look at SIP Configuration and should see under Line 1 Settings:
Names are all set to be the extension (example 207)
Proxy Address is pointing to our Asterisk server (example 172.17.1.31)
Note if you need or want to change any of the settings on the phone manually you will first need to unlock it. Press the check button, and scroll down to the bottom and select "Unlock Config". Use the phone keys to enter the password which is the word cisco.
With skinny loaded on the phone the proceedure is:
Enter the Settings Menu
Select Network Configuration
Enter **# to unlock configuration
Make changes
Enter **# to lock
With all the parts running and plugged into the switch:
-Asterisk server
-Phone
-TFTP Server
Make sure that the devices can see each other.
On the Asterisk server ping the phone using the ip address you saw in the configuration (from the DHCP server)
Using my example
#ping 172.17.1.50
You should see reply messages start to scroll up the screen.
If you see Destination unreachable messages scroll up the screen then asterisk cannot see the phone yet. Verify that Asterisk is on the switch and maybe restart the network services on the server as was discussed in the previous post.
Use CNTRL-C keys to break out of the ping
If the pings worked you should now be able to call extension 401 from the phone. 401 will not dial right away because we did not set that one up in the DIALPLAN.xml file above. If you wait long enough it will dial or you can press the DIAL soft button (third one from the left at the bottom of the phone display).
If all is working Asterisk should playback a message that “weasels have eaten the phone system”. If you got that then congratulations everything is working so far.
Next time we will work on the Asterisk configuration some more.
Asterisk PBX System Install - 06 Two SIP Phones
Asterisk PBX Install - Index
Monday, April 20, 2009
Asterisk PBX & Cisco Install - Index
1. Asterisk Step by Step
2. CentOS Operating System
3. Asterisk Software Install
4. PBX Test Configuration
5. Loading SIP on Cisco Phones
6. Internal Calls on SIP Phones
7. External Line - Inbound Calls
8. Outbound Calls
9. Voicemail and Macros
10. Conference Calls And Parked Calls
11. Overhead Paging
12. Install H323
2. CentOS Operating System
3. Asterisk Software Install
4. PBX Test Configuration
5. Loading SIP on Cisco Phones
6. Internal Calls on SIP Phones
7. External Line - Inbound Calls
8. Outbound Calls
9. Voicemail and Macros
10. Conference Calls And Parked Calls
11. Overhead Paging
12. Install H323
Friday, April 17, 2009
Asterisk PBX System Install - 04 PBX Test Config
Issue: With Asterisk running we want to communicate with it. First step in doing is to configure Asterisk to do something.
Quick/Visual/Learning:
Configuring Asterisk
The first goal is to use a phone to connect to Asterisk and have Asterisk respond.
#cd /etc/asterisk (this is the directory where the asterisk configuration files are)
#mv extensions.conf extensions.conf.sample (mv renames the original sample to extensions.conf.sample)
#touch extensions.conf (This creates a new blank extensions.conf file)
Edit the extensions.conf file to create something we can use to test that the system is working. This is where you setup phone extensions but this is also where you tell Asterisk what to do and how to respond to key presses from the user. This is called the Dialplan for the Asterisk server. There are more details about Dialplans in chapter five of the book but just a quick look for now. Extensions.conf is made up of
-contexts
-extensions
-priorities
-applications
Contexts - are sections set apart by labels in square brackets []. Each section is independent and they do not interact unless you allow them to do so.
Extensions - are not just a phone extension but a set of instructions that are executed when that extension is dialed.
Priorities - determine in what order the extension command are executed.
Applications - execute specific commands like Answering the line or Hanging up the line.
More about this later but for now I just want to configure the file to give me some indication that Asterisk is working. I am going to use the “vi” editing tool so there is some information on how to use it below.
#vi extensions.conf
I like to use vi because it is a common editor on LINUX and UNIX systems but it takes some getting use to.
OK the real truth is, I use vi becuase I took a UNIX class many years ago and that is what I learned how to use. I got an email saying that nano is a good editor. If you want to use it you can install it using yum.
# yum install nano (or emax-nox or vim or any other editor that makes you happy- ;)
Just a quick overview of how vi works if you choose to use it.
I will open a new file called test
#vi test
This opens up a file with the cursor at the top of the file.
In vi there are two modes, Command mode and Insert mode.
You cannot enter text into the file until you get into the Insert mode.
Press the letter i to enter insert mode (use lower case i)
Now you can type some text (you can use the arrow keys to move around)
When you are done you have to go back to Command mode to save and exit.
Press the Esc key to get back to Command mode.
Use the shift key to enter a colon: After the colon, enter wq, which means write and quit like this-
:wq (press enter and you will be out of the vi editor)
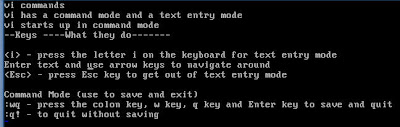 Now lets edit our extensions.conf file
------------------------------------------------
#vi extensions.conf

Next we need to Load sip on the phone.
Quick/Visual/Learning:
Configuring Asterisk
The first goal is to use a phone to connect to Asterisk and have Asterisk respond.
#cd /etc/asterisk (this is the directory where the asterisk configuration files are)
#mv extensions.conf extensions.conf.sample (mv renames the original sample to extensions.conf.sample)
#touch extensions.conf (This creates a new blank extensions.conf file)
Edit the extensions.conf file to create something we can use to test that the system is working. This is where you setup phone extensions but this is also where you tell Asterisk what to do and how to respond to key presses from the user. This is called the Dialplan for the Asterisk server. There are more details about Dialplans in chapter five of the book but just a quick look for now. Extensions.conf is made up of
-contexts
-extensions
-priorities
-applications
Contexts - are sections set apart by labels in square brackets []. Each section is independent and they do not interact unless you allow them to do so.
Extensions - are not just a phone extension but a set of instructions that are executed when that extension is dialed.
Priorities - determine in what order the extension command are executed.
Applications - execute specific commands like Answering the line or Hanging up the line.
More about this later but for now I just want to configure the file to give me some indication that Asterisk is working. I am going to use the “vi” editing tool so there is some information on how to use it below.
#vi extensions.conf
I like to use vi because it is a common editor on LINUX and UNIX systems but it takes some getting use to.
OK the real truth is, I use vi becuase I took a UNIX class many years ago and that is what I learned how to use. I got an email saying that nano is a good editor. If you want to use it you can install it using yum.
# yum install nano (or emax-nox or vim or any other editor that makes you happy- ;)
Just a quick overview of how vi works if you choose to use it.
I will open a new file called test
#vi test
This opens up a file with the cursor at the top of the file.
In vi there are two modes, Command mode and Insert mode.
You cannot enter text into the file until you get into the Insert mode.
Press the letter i to enter insert mode (use lower case i)
Now you can type some text (you can use the arrow keys to move around)
When you are done you have to go back to Command mode to save and exit.
Press the Esc key to get back to Command mode.
Use the shift key to enter a colon: After the colon, enter wq, which means write and quit like this-
:wq (press enter and you will be out of the vi editor)
Now lets edit our extensions.conf file------------------------------------------------
#vi extensions.conf

i (you will see the text -- INSERT -- at the bottom of the screen
You can now start entering text.
[globals]
[general]
[default]
[incoming_calls]
[internal]
exten => 401,1,Answer
exten => 401,n,Playback(tt-weasels)
exten=> 401,n,Hangup()
[phones]
include => internal
Esc key to get out of insert mode
:wq Enter key to write and exit
-------------------------------------------
Note if you need to exit vi without saving :q! will force quit with no write.
.
Most of the sections are empty for now. Under the internal context, the commands labeled 401 will execute when extension 401 is dialed. The call will answer, play a sound file, and then hang up the line.
Now we are going to do the same kind of thing with the sip.conf file.
#mv sip.conf sip.conf.sample (mv renames the original sample to sip.conf.sample)
#touch sip.conf (This creates a new blank sip.conf file)
------------------------------------------------------
#vi sip.conf
i
[general]
[207]
context=internal
type=friend
disallow=all
allow=ulaw
host=dynamic
Esc-Key
:wq
---------------------------------------------------
In the sip.conf file under the section [207] is where I configure Asterisk to allow my phone to connect with Asterisk. More about this later when we configure the Cisco 7940 phone to use sip (Session Initiation Protocol) commands. Notice that under [207] is the context of internal. This is the context name I used to setup the 401 test in the extension.conf file.
To recap the sip.conf file is going to allow my phone (extension 207) to connect to asterisk using the context of internal. The extensions.conf file has the 401 extension defined in the same context of “internal” and is configured to play back a sound when I dial that number from my phone.
Now we need to load the new configuration into Asterisk.
If asterisk is not running you can start it by typing at the command line:
#asterisk –vvv (set verbose to 3 which gives you more info in the console screen)
If Asterisk is running you can connect to the Asterisk console by typing “asterisk –r”
#asterisk –r

Your command line changes a bit and you have ServerName*CLI> which indicates you are in the Asterisk Console view.

In asterisk the interface is a bit like cisco command line interface.
>? A question mark will bring up help information
>dialplan ? Will tell you what options you can use with the dialplan command
To load the changes made to extensions.conf type:
>dialplan reload
Some lines of text will show up on the screen. (you may have to press enter to get back to the prompt)
Note: If anyone knows how to keep the console screen from scrolling off before you can read the output please let me know. The workaround is to use the PuTTY program to connect to the asterisk server and launch the Asterisk console. This allows you scroll back the screen.
To load the changes made to the sip.conf file type:
>sip reload
Some lines of text will show up on the screen. (you may have to press enter to get back to the prompt)
To get out of the Asterisk console type exit
>exit
Next we need to Load sip on the phone.
Friday, April 10, 2009
Asterisk PBX System Install - 03 Software
Issue:
Packages need to be installed on our Linux CentOS in order to install and run the Asterisk software.
Quick/Visual/Learning: When the computer reboots logon with the root password in the command window. Along with the OS they say I need the following packages:
-Asterisk (along with Extra Sound Files)
-Zaptel Drivers
-PRI Libraries
There are also some Linux packages to be installed, below is the table from the book p.39:
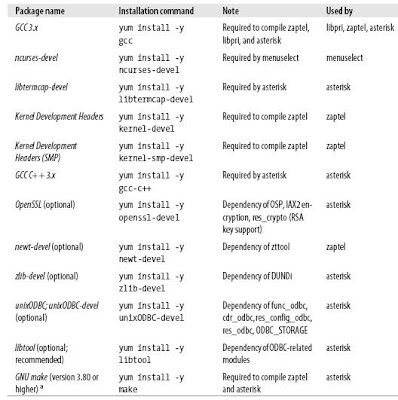
Yum is used to get and install the packages. You need to have a network cable and working internet connection connected to your CentOS box for this to work. Below is an example of what you should see after you type the yum command to download package. You should see that it is downloading some files.
Packages need to be installed on our Linux CentOS in order to install and run the Asterisk software.
Quick/Visual/Learning: When the computer reboots logon with the root password in the command window. Along with the OS they say I need the following packages:
-Asterisk (along with Extra Sound Files)
-Zaptel Drivers
-PRI Libraries
There are also some Linux packages to be installed, below is the table from the book p.39:

Yum is used to get and install the packages. You need to have a network cable and working internet connection connected to your CentOS box for this to work. Below is an example of what you should see after you type the yum command to download package. You should see that it is downloading some files.


If you are using single processor machine:
-----------single processor commands----------
# rpm -e kernel-devel (removes the kernel-devel module if it is installed)
# yum update kernel* (updates the kernel)
# init 6 (reboot the machine to load the updated kernel)
----------end single processor commands----------
If you are using multi-processor or machine:
------------multi-processor commands-------------
# rpm -e kernel-devel (removes the kernel-devel module if installed)
# rpm -e kernel-smp-devel (removes the kernel-devel module for smp if installed)
# yum update kernel-smp* (update the kernel for smp)
# init 6 (reboot to load the updated kernel)
------------end multi-processor commands-------------
Be sure to reboot the server before installing these packages (important for getting the correct kernel development package).
Here is a list of the packages I installed.
yum install -y gcc
yum install -y ncurses-devel
yum install -y libtermcap-devel
yum install -y kernel-devel (for single processor)
yum install -y kernel-smp-devel (for multi-processor)
If you do not have the right development package installed, you will get an error when you try to compile your software, stating that you do not appear to have the sources for the kernel installed.
yum install -y gcc-c++
yum install -y openssl-devel
yum install -y newt-devel
yum install -y zlib-devel
yum install -y unixODBC-devel
yum install -y libtool
yum install -y make
The wget command is suggested for downloading software files to CentOS.
To download Asterisk 1.4 to the system, first change to the directory where we want to download the files, and run the following commands:
Type cd /usr/src/ to Change Directory to the /usr/src directory
# cd /usr/src/
# wget http://downloads.digium.com/pub/asterisk/asterisk-1.4-current.tar.gz
# wget http://downloads.digium.com/pub/libpri/libpri-1.4-current.tar.gz
# wget http://downloads.digium.com/pub/zaptel/zaptel-1.4-current.tar.gz

Next extract the 3 files
Note: you can use tar zxvf za{Tab} to have the OS complete the filename.
# cd /usr/src/
# tar zxvf zaptel-1.4-current.tar.gz
# tar zxvf libpri-1.4-current.tar.gz
# tar zxvf asterisk-1.4-current.tar.gz
The above commands will extract the files into subfolders under the /usr/src directory
Asterisk includes tools to help build the software modules you need for the phone system. Menuselect is one of these tools that you will see below.
First install Zaptel which handles communication between Asterisk software and the phone hardware.
Note: The book talks about a symbolic folder link named linux-2.4, but it is not needed.
Note: UPPER and lower case matters in Linux commands.
Next we need to compile Zaptel
First do an ls command to find out what the name of the directory is for Zaptel.
#ls
The directory which you may be able to see in the picture below (hard to see because it is in blue) is called zaptel-1.4.12.1
Now to change from the /usr/scr directory to the /usr/scr/zaptel-1.4.12.1 directory I type the command:
#cd /usr/src/zaptel-1.4.12.1
# make clean (I do not think this is really needed unless you need to clean out files from a previous install attempt. If you have any problems try "make distclean" instead of "make clean" to also remove files from menuconfig subdirectory)
# ./configure
# make menuselect
This brings up this menu.
I did not make changes here. (If you are not going to make changes you should not need to run menuselect so you could skip this step)
Just press the x key to save and exit.
# make
# make install
# make config
I do not have any phone hardware installed on the server so is does not find any and no reason for me to edit the file indicated below as I will be using a Cisco call router.
Now I compile libpri (This may not be needed but the book says it does not hurt to install it)
Do an ls command on in the scr directory to get the right directory name
First change to the /usr/src/ directory and then do a listing.
#cd /usr/src/
#ls /usr/src/
#cd /usr/src/libpri-version (fill in the correct version name)
#make clean
#make
#make install
Now with Zzptel and libpri installed it is time to compile Asterisk
#cd /usr/src/
#ls /usr/src/
# cd /usr/src/asterisk-version
# make clean
# ./configure
#make menuselect
For menu navigation use the arrow keys:
Use the up and down arrow keys to move up and down.
Use the right arrow key to select an item
Use the left arrow key to go back
Use the x key to save and exit
Move down to Extras Sound Packages
Use right arrow to get into the submenu
Select the extra sounds GSM file. These will have sound recording that you will need to use with the phone system.
X key to exit the menu
Note : empty brackets [ ] means not going to be installed [*] means will install [xxx] means missing dependency so it can't be installed at this time.
#make install
This command will take a few minutes to run
# make samples
#make config
You should now have Asterisk installed.
Next time we start working on the configuration.


Friday, April 3, 2009
Asterisk PBX System Install - 02 OS
Issue:
Install Linux CentOS for our Asterisk PBX
Quick/Visual/Learning:
I am still using the pdf book I downloaded in the first post.
Chapter 3 - Installing Asterisk -
They focus on running CentOS which seems to be a copycat version of RedHat Linux Enterprise. I have no preference for OS so I am going with the one in the book.
I did a google search and found centos.org
I want everything to match the book as best a possible so I downloaded single CD image (iso file) of 4.7 version of CentOS. (version 4.4 is the one they use in the book but I felt better about downloading the last revision of the software)
Install Linux CentOS for our Asterisk PBX
Quick/Visual/Learning:
I am still using the pdf book I downloaded in the first post.
Chapter 3 - Installing Asterisk -
They focus on running CentOS which seems to be a copycat version of RedHat Linux Enterprise. I have no preference for OS so I am going with the one in the book.
I did a google search and found centos.org
I want everything to match the book as best a possible so I downloaded single CD image (iso file) of 4.7 version of CentOS. (version 4.4 is the one they use in the book but I felt better about downloading the last revision of the software)
 I picked i386 next because my Dell has a 32 bit Intel processor.
Next you get a big list of sites where you can download the CD image. Pick one and select the Server CD iso which is a little over 600 MB in size.
I use Nero software to burn my iso image to a CD but use whatever tool you like. You can probably search on "free iso burner" and find some options as well.
I put my CentOS 4.7 cd in my Dell server and power on the machine I get a series of install windows.
I selected enter to boot graphical mode
Test CD media (skip this if you think your media is good)
Welcome Screen (click next)
Select Language (click next)
Select keyboard (click next)

Disk partition I selected automatic (click next)
If there is nothing on your drives you will a question about initializing the drive. On a system with existing software the prompt is about if you want to remove all partitions on the system. Click Yes. Drives listed for use. I selected sda and clicked next
Warning message Click Yes
The system configuration screen for the drives shows. Click on next
Boot loader Screen GRUB. Loads OS from the CentOS cd. Click next
Select the network card eth0 and click on Edit to give the card a static IP address. Unchecked “Configure using DHCP”. I am not going to want the ip address of the PBX to change so I give it a static ip address.
Click OK and at the bottom of this screen configure gateway and DNS information. Click Next
Firewall Screen selected no firewall as the machine is behind our company firewall. Disabled SELinux (Enabled should be OK too)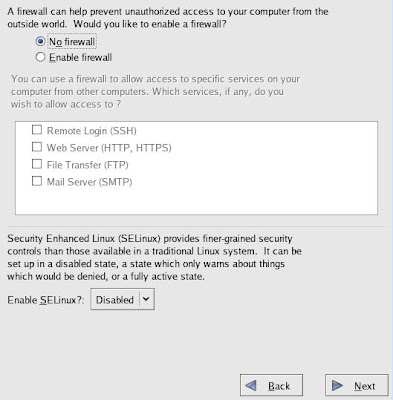
Get warning about no firewall just click proceed.
Language screen I took the English (USA) default and clicked Next Selected Time zone and clicked next (note you can click on the map to select area)
 Entered the root password twice and next
Package window I clicked on Customized option as I do not want to load a bunch of unneeded stuff. I do load a few things here but you may be able to get away with loading nothing and just downloading the required packages (saved for the next post)
I want to minimize what is running on this server so no desktop packages.
Under Applications I selected text based Internet because I will need to download software to the machine. I also thought that sound support might be handy but maybe not.
Under Servers I only selected configuration tools
Under Development - Development tools
Under System - Administration Tools
Select Next Click on Next to start the install
You get an install warning that this is the point of no return. Click on next and you see the installation begin
Install completes remove the install cd and you can now reboot the computer.
NEXT POST IS ABOUT INSTALLING ASTERISK AND PACKAGES
Asterisk PBX System Install - 03 Software
Subscribe to:
Posts (Atom)