Issue:
Give Outlook form reader extra or different information that was not on the form when it was sent. Providing forms for responding to, and routing information.
Quick:
Change form read layout - menu, Separate Read Layout, Save copy of files as .oft to be used for creating reply forms, install on the server, create custom actions on the original form to use reply forms.
Visual/Learning:
It is time to think about reply forms. Here is what the running form currently looks like.
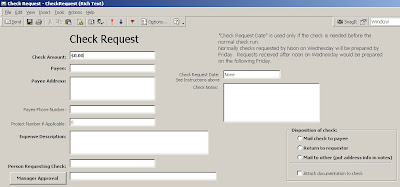
There are 3 situations where a reply is required. 1. Manager rejects request, 2. Manager approves request, 3. Finance confirms check cut date.
1 and 2 both come from the manager so I could use a single reply form that just had a control to accept or reject the request. On the other hand I would like to route the rejected request just back to the requester, while accepted requests need to go to the finance department as well. I am thinking I want to pre-address these messages so they go to the right places automatically and the quick and dirty way to do this is to use two separate reply forms.
I also need a 3rd reply form for responses from the finance department.
There is no need to start reply forms from scratch. My current form already has all the right fields in it so just do a Save As and create 3 separate copies of our current form to be modified later.
 Before working on the reply forms I want to modify what the receiver sees when he gets a form from the requester. One Outlook form can have two separate layouts. One layout for composing the message and a completely different one for reading the message. This is very useful in this case because I would like to put one set of instructions on the compose page for the person filling out the form, and another set of instructions on the read page for the person responding to the form.
To separate out the read page go to the Form menu and select "Separate Read Layout".
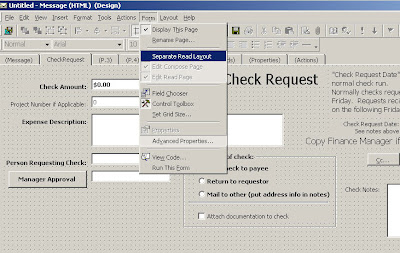
Now go to the Form menu again and select "Edit Read Page"
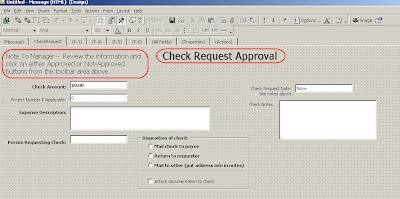
 On the read page you see that it starts off as being a copy of what is on the compose page. Below you can see I have changed the Read page by changing the title from "Check Request" to "Check Request Approval". I have also put some instructions in regarding what the person needs to do in order to Approve or Not-Approve the request, and I have deleted the instructions from the read form that were only for the requester to use.
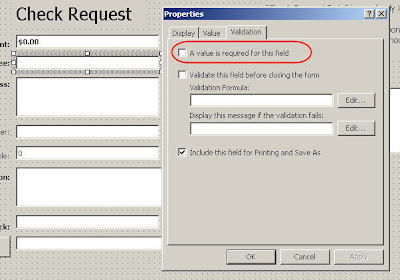
I will also change the data fields to be read only so that the information that came from the requester is locked in. Go to the properties page on each field and check the box for "Read Only"
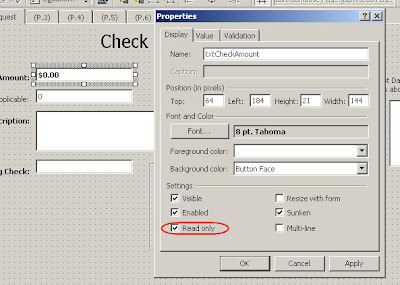
Now all the fields show as grayed out and their contents will be unchangeable on the read page.
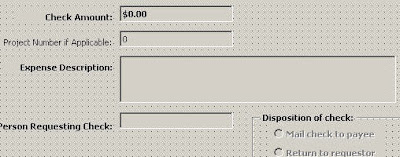
Re-save this form as and OFT file and work on one of the reply forms. Here I have the OFT form that will be used for approved check requests. The title has been changed and all the instructions have been removed. Also all of the data fields have been set to "Read Only".
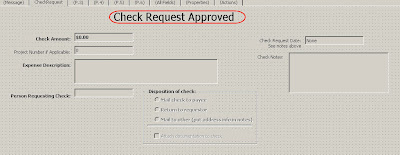
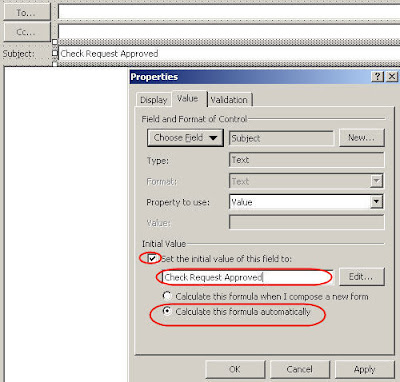
On the (Message) tab I am going to set the Subject properties under the value tab to be automatically set as "Check Request Approved". Even though the Message page is hidden the Subject will still show up on the form in the Outlook inbox.
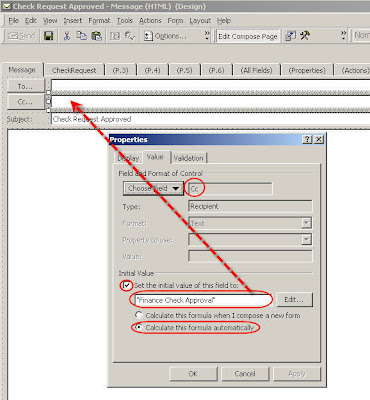
I am also going to set the CC field to automatically populate with "Finance Check Approval". This is the name of an Exchange server email group containing the 2 people in finance that will need to see these messages. Now these people will automatically get these messages regarding approved check requests. I could have also addressed this message to individual people but in this case I am using a group. The nice thing about using a group is that you can change where the form goes to by changing the group membership and without having to make changes to the form.
OK Save the Approval form and open the Not-Approved form.
Again I change the tile of the Form and I added a box for comments so that the manager can say why this request was rejected.
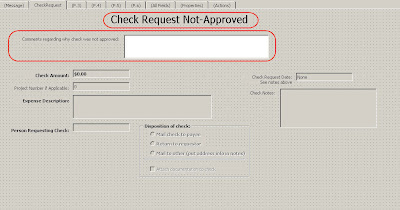
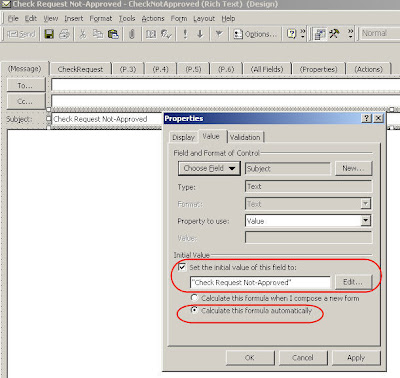
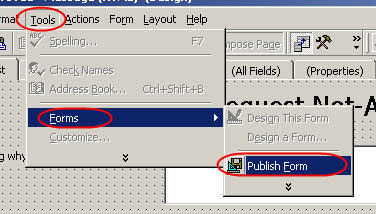
On the (Message) tab I am going to change the subject to "Check Request Not-Approved" but I am not going to send this message to any additional people.
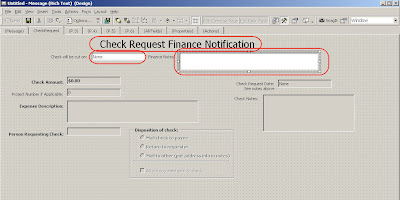
Save the Not-Approved form edit the last reply form, which is the response form from Finance. Here I changed the title to "Check Request Finance Notification"
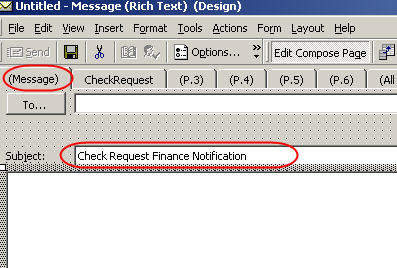
And set the subject line to "Check Request Finance Notification"
Go To Outlook Forms 10
Go to Outlook Forms Index


 I can enter a string to filter on. Here I am filtering on packets that have the string arp. All you have to do is type the string at the end of the command line.
 Here is a manual for the various switches you can use with WinDump http://www.winpcap.org/windump/docs/manual.htm


 With the message class information I can modify the java script found on the aforementioned website to access my form.

 When I click on one of these links I get a warning:





 On the (Message) tab I am going to change the subject to "Check Request Not-Approved" but I am not going to send this message to any additional people.
 And set the subject line to "Check Request Finance Notification"